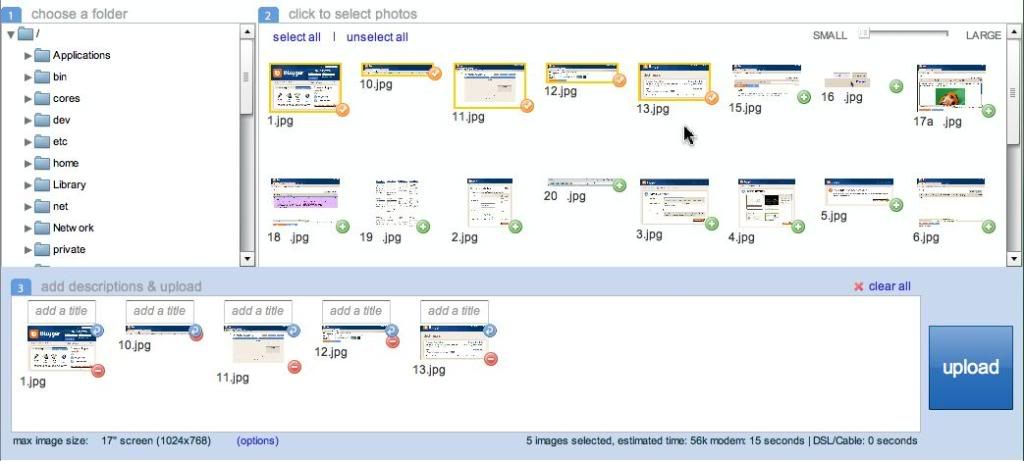
Just click on the icon of each photo from your desktop then [Upload].
In preparing a blog I use saved templates and do all the picture insertions at first on a word document on my computer. When completed I just cut and paste the finished picture codes into the blog window using [Edit HTML]. This is a much quicker and vastly safer technique as working in the blog window can have disastrous consequences when it locks up between saves. You’ll only need to go through this one time and you’ll change the way you do it.
Here’s what my first paragraph above looks like in HTML code before I cut and pasted it into the blog window. At first it’s very scary looking but when you have a blank template to work with it’s easy.
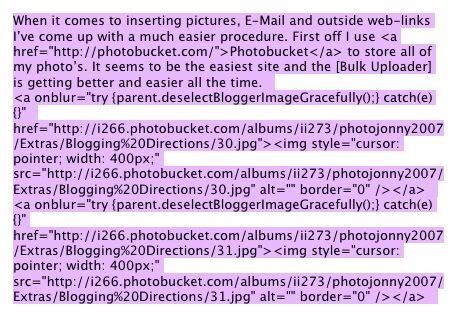
This is my blank template in HTML code for the largest pictures accepted, 400px. You can cut and paste it for your own use.
This is my blank template in HTML code for smaller pictures, 320px. Cut and paste this for your own use.
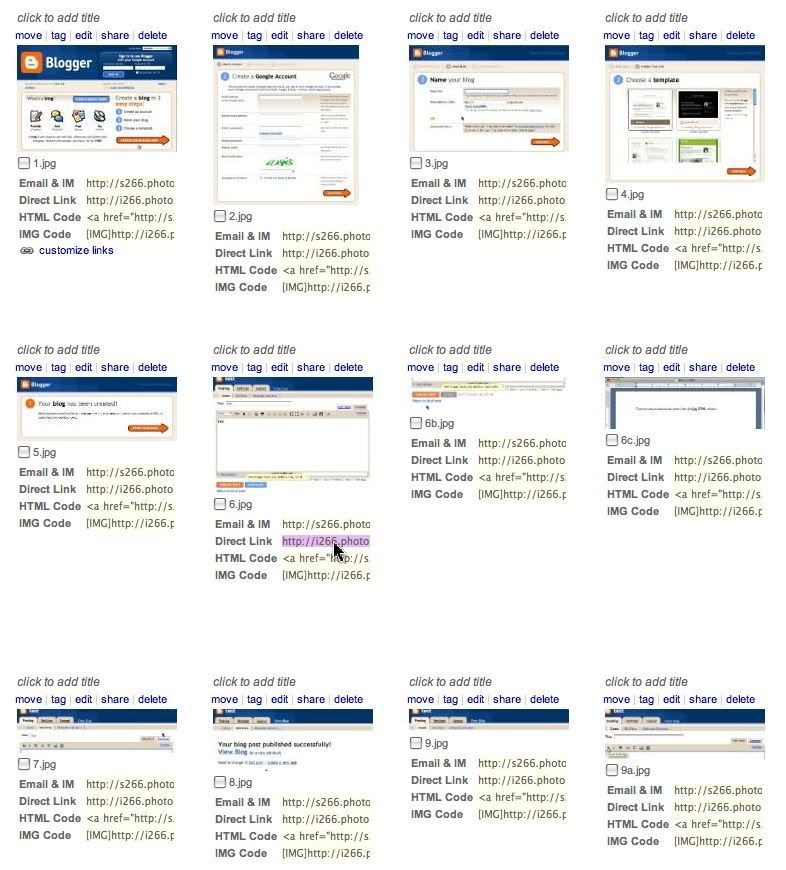
The XXXX is where you insert your [Direct Link] from Photobucket by holding your cursor over it and clicking as shown below. It copies this important address automatically. The width is the only difference in each of these examples and you can experiment with any pixel size you like up to 400px as values larger than 400px will automatically crop your photo. The actual sizes of your original photo only maters if it’s not perfectly square. Rectangular photos post differently.
Cut and Paste the template I use for the address of a Web-Link you wish to add;
The address is in red and the text you want seen is in green. Here’s what the HTML code of the above Photobucket link looks like (make sure you add no additional spaces);

Cut and Paste the template I use to add an E-Mail Link;
The address again is in red and the text you want seen is in green.
Screen-Shots are now easy to do. I have a Mac and use Snapz Pro X. For pc’s there are a lot of choices for Screen Capture software.
(C) 2008 Jonny53
No comments:
Post a Comment